
What is serverless framework
Checkout the github repository for this!
In addition to basic examples shown in this code, there are other use cases that have been explored in repository
Introduction
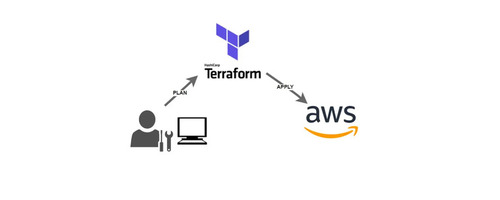
In this series, we are going to focus our attention on Serverless. If you have read my series on terraform, or you already have used Terraform, then you know how awesome it is for deploying infra in matter of minutes. If so, why learn another tool for the same ?
Well, the serverless framework has been created specifically for the creating serverless apps in as little time as possible. It abstracts away a lot of details and just a bunch of lines can create infrastructure that would otherwise take hundreds (if we were to write a cloudformation stack for the same). We will see what makes serverless so great for this use-case.
Just like terraform, serverless is cloud agnositic, so it supports multiple providers like AWS, GCP and Azure.
Setting up
I recommend the official page for the setup and installation of serverless on your system.
Before starting, I just want to give a shout out to WSL (Windows Subsystem for Linux). If you are a developer with windows machine, and do not currently use it, I highly recommend it as it will make your development experience a breeze.
Once you have setup serverless on your machine, it is time to configure it. To start using serverless on your local machine, you do not need to configure it if you already have AWS-CLI setup, as serverless will use the default profile to perform deployments.
While creating policies in production, always follow principal of least priveleges.
In case you have not configured AWS-CLI with a default user, then you perform the following steps -
- Open AWS console, go to IAM, then Users and create new user called serverless.
- Attach AdministratorFullAccess policy to the user (to make things easy).
- Create Access Key and Secret, using Create Access Keys option for the user just created
# Command to configure serverless
serverless --version
serverless config credentials --provider aws --key yourKey --secret yourSecret
Test setup
To test everything has been setup properly, we will quicky deploy a lambda function. To create the starter code for this practice.
# Create a test project
serverless create --template aws-python --path new_project --name testFunc

# This creates the project directory
new_project
├── handler.py
└── serverless.yml
In the directory that has been created, if you remove the comments, you are left with serverless.yml as below -
# Serverless.ynl
service: testFunc
frameworkVersion: '3'

provider:
  name: aws
  runtime: python3.8

functions:
  hello:
    handler: handler.hello
Let’s quicky run the command sls-deploy and wait for the deployment to finish.

As you can see in the figure above, we were able to create the function as required. To remove this stack you can run sls remove
Congratulation, and good job.
Invoking the function
When developing lambda functions, you may want to test the same. Having to open AWS Console defeats the purpose. So, the serverless framework provides us with a handy way to do the same.
# Invoke and log the output
sls invoke -f hello --log

# View previous logs
sls logs -f hello --tail
Output
$ sls invoke -f hello --log
{
    "statusCode": 200,
    "body": "{\"message\": \"Go Serverless v1.0! Your function executed successfully!\", \"input\": {}}"
}
--------------------------------------------------------------------
START
END Duration: 1.33 ms (init: 130.95 ms) Memory Used: 38 MB
Using external libraries
It may be required for you to package 3rd party python libraries. There are essentially 2 ways to do that -
- Package them as a zip file and upload along with your code.
- Upload them to lambda layers.1
For both above, we will make use of a plugin called serverless-python-requirements. You can install the same by running sls install -n serverless-python-requirements.
Make sure to add the below in serverless.yml file.
plugins:
  - serverless-python-requirements

# How to use ZIP file
custom:
  pythonRequirements:
    dockerizePip: true
    zip: true

# How to use lambda layer
custom:
  pythonRequirements:
    dockerizePip: true
    layer:
      name: PandasLayer
In both approaches below, we will use a requirements.txt file where we mention the libraries to install such as pandas==1.0.1.
Serverless framework really names it super easy to be able to deploy third party libraries as layers or as zipfile.
In case of zip file, there is an additional step to run import unzip_requirements at top of script for the zipped libraries to become available for use.
Footnotes
-
Lambda layers allow you to upload modules that can be shared across multiple lambda functions. ↩
Leave a comment